

📷 Custom icons (sprite sheets)
In this topic I'll explain how to create custom sprite sheets. (it's little harder then other topics)
First of all, what are sprite sheets? It's an old technology that allows you to store a bunch of different pictures in one. This is more convenient than storing many different pictures separately, without any order.
On the downside, sprite sheets need to be prepared. Just one picture is not enough, you need additional (meta) information, which contains coordinates, sizes and names of pictures.
To prepare sprite sheets for GloriousHUD I wrote a CLI (command line interface) utility in node.js. The requirements come out of this.
Requirements:
- Node.js 18+
- NPM
Let's begin.
- Install my utility using
npm install gh-spritegen -g - Prepare your assets, how to do this is described in the README on npmjs or github (WARNING: do not use sprite names such as
custom,flags,lucide, they are already used in GloriousHUD) - Execute spritegen using
spritegen -a assets -o output -p false - Now we need to add this to the Garry's mod content
- Create a folder with any name you want in
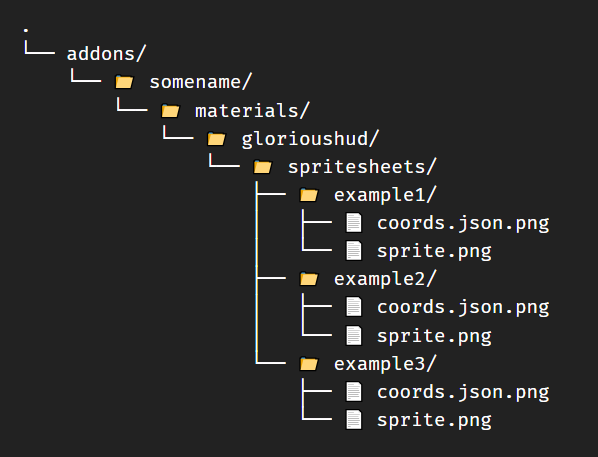
garrysmod/addonsof your Garry's mod client - Next create structure like this.
sprite.pngis renamedsprite-x-x.pngfrom spritegen output, andcoords.json.pngiscoords.json. JSON file has changed its extension because Garry's mod does not allow JSON and text files in the game content.
Once you have created your addon with content for the HUD, you can test it in-game. To do this:
- Enable debug mode in
glorioushud/lua/autorun/gh_init.luaon line 20 changefalsetotrue - Restart Garry's mod and server
- Connect to server
- In console run command
gh_spritedebugand find your spritesheet(s) using arrows
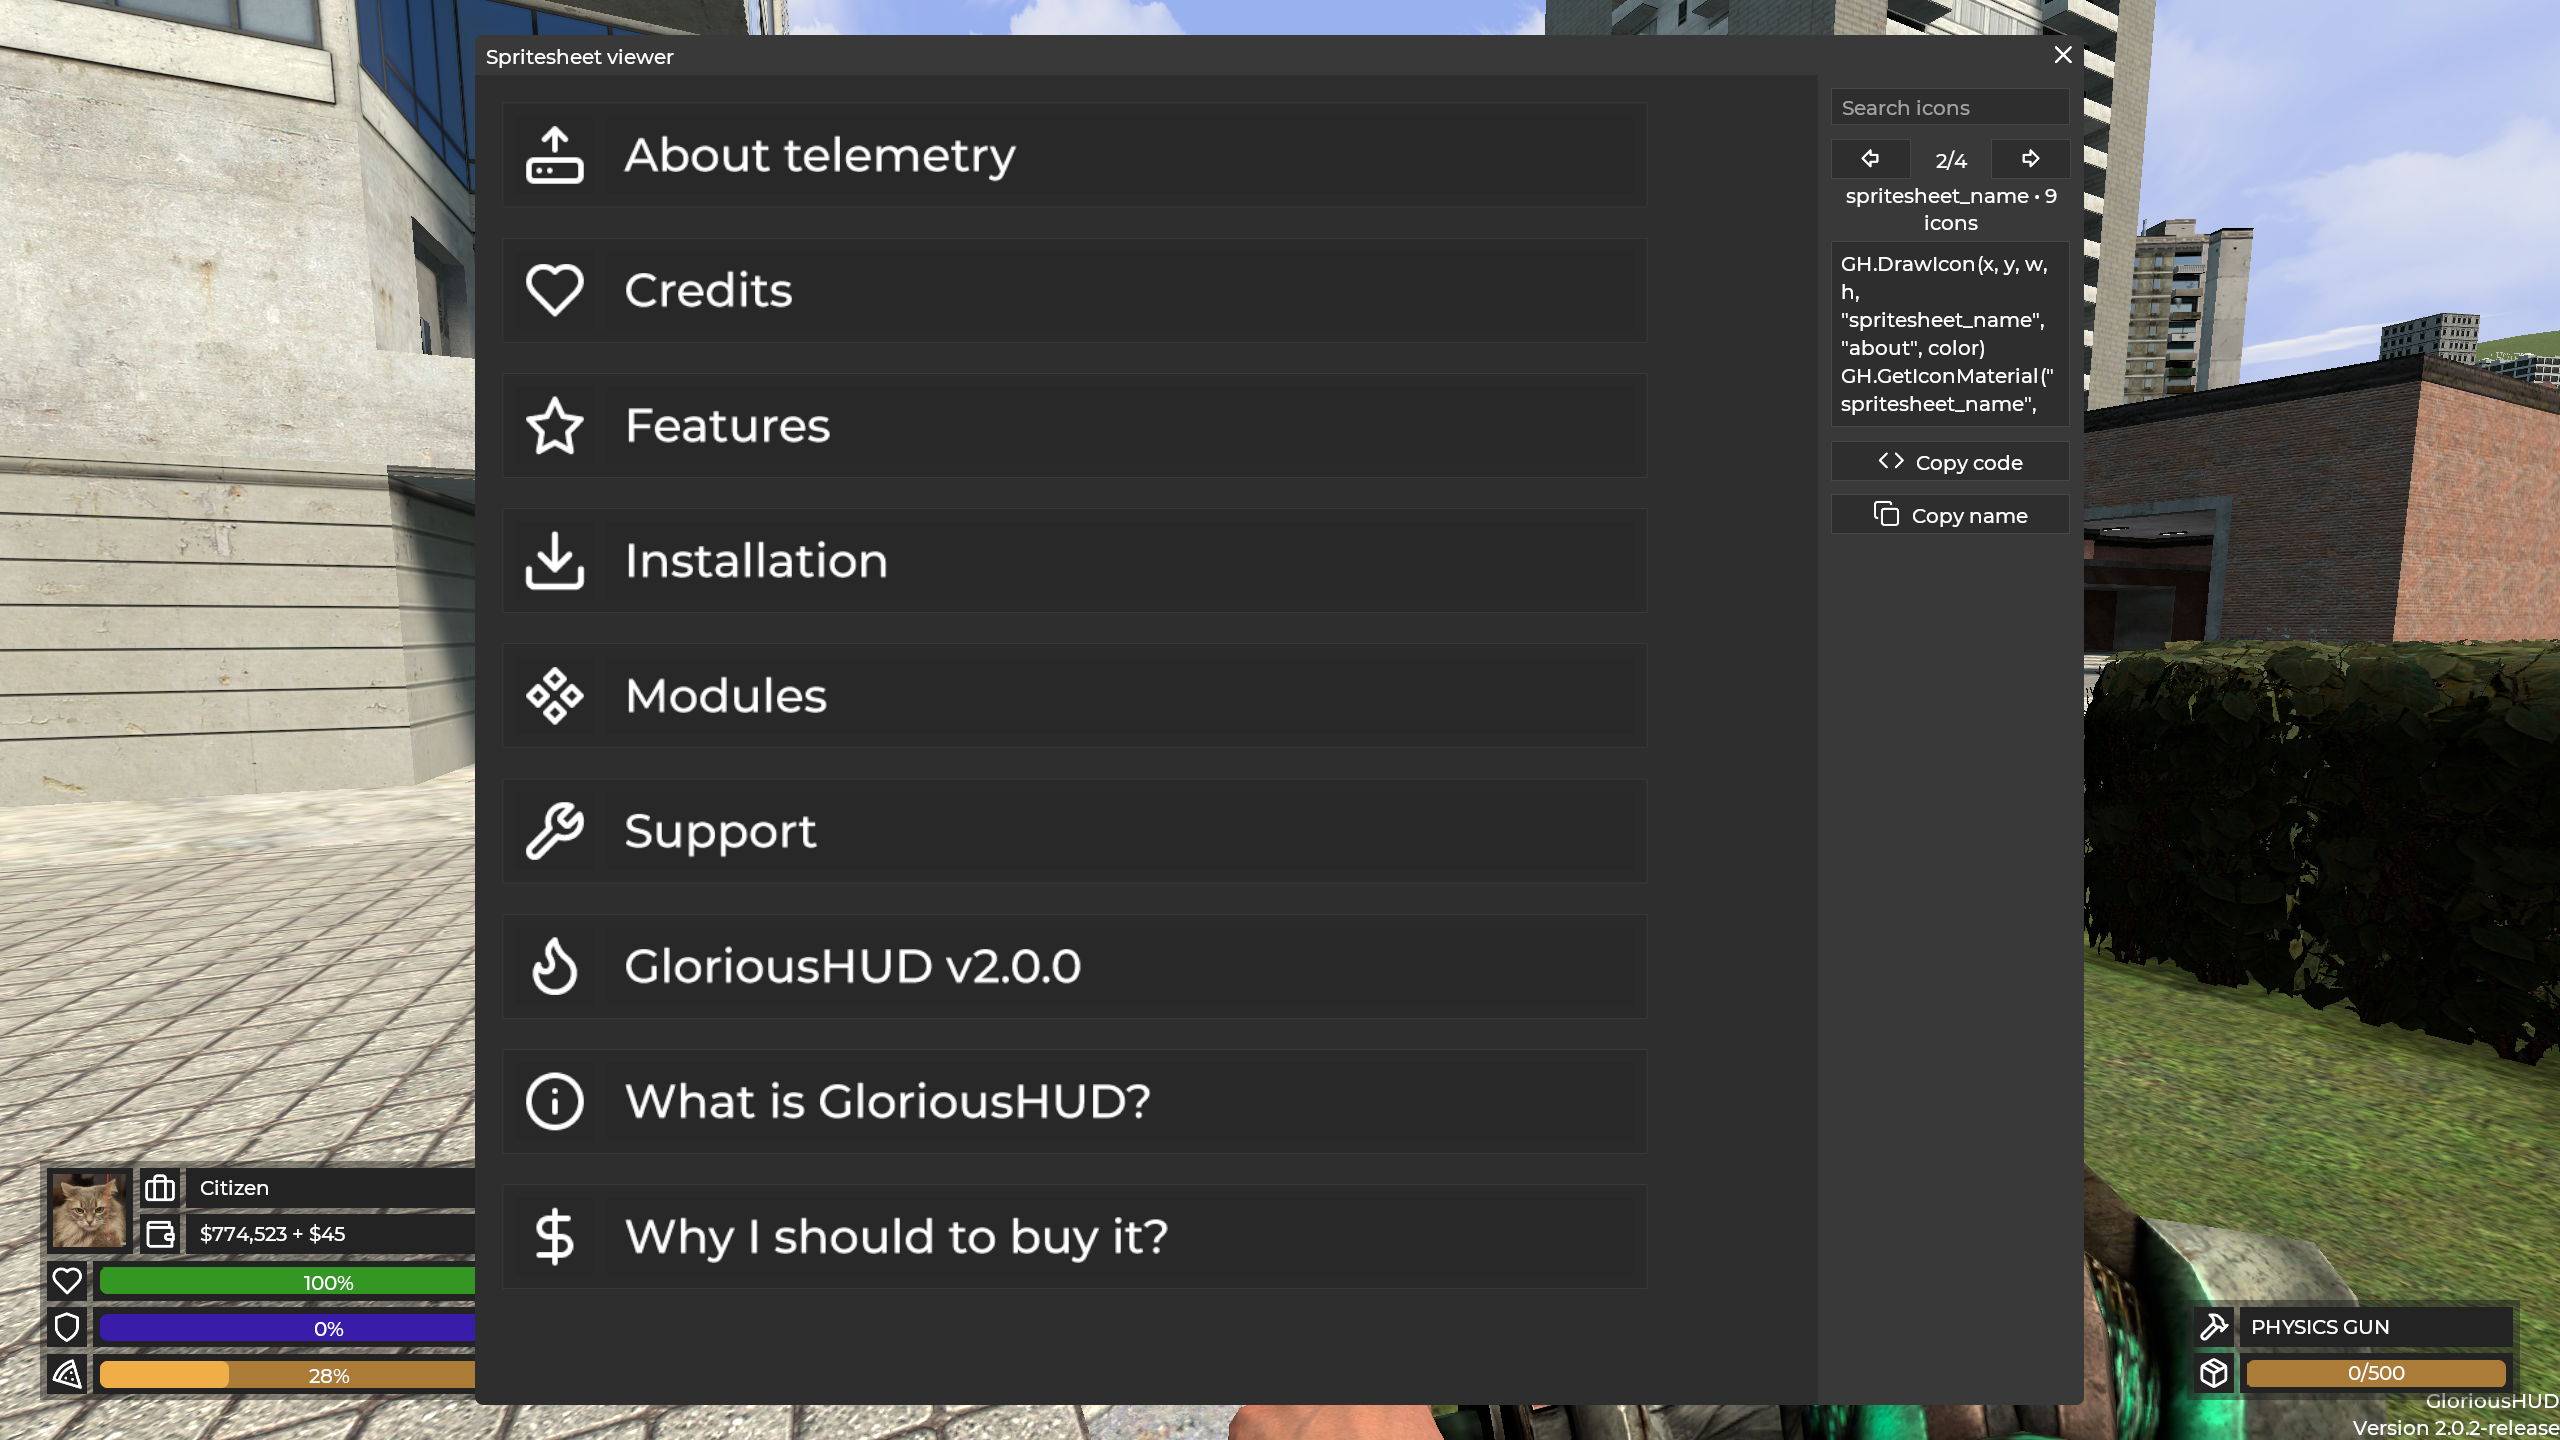
The addon you created can be put in the steam workshop for your players to download the content.
Don't forget to disable debug after you're done.